Belated Christmas & New Years

As we weren’t able to spend Christmas and New Years together, we rain-checked to celebrate last night. You know, nothing says celebration like a Tuesday night ๐Ÿ™‚


Since he doesn’t eat turkey, we had to come up with something fitting for the occasion. Enter, risotto with scallops! My recipe is modified from this one from SkinnyTaste.

Now, I’ve only made risotto once before, and that was really just as an experiment to see if I could make it, and neither of us has made scallops! No pressure or anything. Thankfully, I have a wonderful seafood store that was able to give me tips on how to not botch the poor, beautiful scallops.

Risotto
2 Tbsp Butter
1 Clove Garlic
2 Shallots
Salt & Pepper
1 C Arborio Rice
1/2 C White Wine
2 C Vegetable Broth
2 C Water
1/4 C Parmesan Cheese

In a small pot, on low heat, warm the vegetable broth/water. I don’t love the taste of vegetable broth, so I cut the 4 C down to 2 and used water to thin out the flavours.

In a frying pan, on medium-low heat, melt the butter. Add the garlic and shallots. Cook for about 1 min to allow the flavours to come through. Add the rice, salt & pepper, and continue to stir. Basically, risotto is just a good shoulder workout – there’s a lot of stirring! Cook for about 2 mins (while stirring), until the rice starts to lighten (turn shiny/translucent).

Oh, the other thing that risotto is good for!? Here it is…add the wine now. At this point, you have an open bottle of wine, so poor yourself a class to drink while you keep on stirring ๐Ÿ™‚

Keep stirring.

And stirring.

And stirring, until the wine is sucked into the rice. Then, ladle in your stock/water, little bits at a time…and keep on stirring, taking sips of wine as you go.

When you have about 2-3 more ladles of liquid left, add the parmesan and start the greens and scallops.

Greens
2 Tbsp Butter
1 Clove Garlic
Dark greens of choice – we used kale

In a frying pan, heat the butter and garlic. Add the greens and cook until “done”.

Scallops
2 Tbsp Coconut Oil
Scallops

In a non-stick or cast iron frying pan (you can use a different pan, but you’ll want to lay down a bit of salt to keep the scallops from sticking), heat the pan over medium heat and add the coconut oil. When the pan is hot (not warm, hot), add the scallops and cook for 4-6 minutes on one side. Flip the scallops and cook another 1-2 minutes. Cooking time depends on how large/thick the scallops are.

Time everything perfectly, take another sip of wine, and plate ๐Ÿ˜‰

Super Salad with Miso Tahini Dressing

Yes, this is not the first time I’ve posted a variation of this salad, it’s just so darn good! 

 
Today’s salad consists of:

  • Short grain brown rice
  • Massaged dinosour kale
  • Lettuce
  • Bell peppers
  • Zucchini
  • Grated beets

Marinated Tofu:

  • Garlic clove
  • Soy sauce
  • Szechwan sauce

Cube, marinate, bake on parchment until crispy. 

Miso tahini dressing:

  • Miso paste
  • Tahini
  • Olive oil
  • Orange juice
  • Maple syrup (just a splash)
  • Garlic clove

Vegetarian Burrito Bowl

I could seriously eat all the burrito bowls! And I, finally, managed to make one at home – I buy a lot of them, so this is a big cost-saver for me.


Here is my super easy vegetarian burrito bowl “recipe”:

Rice
Prepare rice however you usually do, but add:
1/2 lime juice
Cilantro (at the end)

Vegetables
In a frying pan, saute:
Red/white onion
Bell peppers
Zucchini
Any other veggies you like

Beans
In a frying pan, combine
1 can black beans (rinsed)
1 can/cob corn
2 Tbsp tomato paste
Taco seasoning – to taste (I used a store bought one by Simply Organic, but I will, eventually, make one)

Toppings
Lettuce
Avocado/Guacamole
Cucumber
Cilantro
Let your creativity run here!

Layer or divide in a bowl and nom, nom, nom!

I packed this up for lunch with the rice, beans and veggies in one container and the toppings in a separate one. I then heated up the rice container before adding the toppings.

Dream Salad

There’s a cafeย here in Vancouver, Eternal Abundance, that is amazing! They have this Super Salad that I love and will buy on occasion; however, I can’t buy it every day so I’ve made a few attempts at recreating it on my own. I think I did a pretty good job with this one.

Super Salad

Salad:
Short grain brown rice (cooked as you see fit – I kept it simple with just water)
Kale-slaw mix from Whole Foods (Kale, carrots, red and green cabbage)
Red and Green Peppers
Avocado
Sprouts
*I would have also added cucumber and celery, but I kept them separate for an afternoon snack.
**Obviously add any other veggies you want!

Dressing:
Olive Oil
Apple Cider Vinegar
Orange Juice (I cut about 1/3 of an orange off and squeezed it)
Miso (about a table spoon??)
Garlic (1 clove, crushed)
Ginger (1 inch, crushed/chopped)
*Sorry, I have no idea how much of everything I put in, just work it around until it tastes right to you ๐Ÿ™‚

Gluten-Free Christmas Cookies (Year 2)

The original purpose of this “blog” was to have a place to store my favourite recipes. It has since turned into somewhere to post my teaching schedule. This means that I haven’t been posting much content. I’m not saying that’s going to change, but I felt the need to put these few recipes up as good recipes are worth sharing!

Today was a day of retail therapy. I could call it Christmas shopping, but only some of the purchases were presents (for others). Finally, I tore myself away from shopping to attempt some gluten-free baking. I had found this recipe a couple of weeks ago and, after some additional searching, decided to give it a shot โ€” good choice! These babiesย melt, like actuallyย melt! I guess a pound of butter will do that to a cookie… These are definitely NOT healthy, but that’s ok โ€”ย life is all about balance right?

I followed her recipe pretty much exactly (unheard of for me, I know).

Gluten-Free Shortbread

Velma’s Gluten-Free Shortbread Cookies
3 C White Rice Flour (I used Bob Red Mills)
1 C Corn Starch
1 C Icing Sugar
1 lb Softened Butter

Preheat the oven to 325 degrees
Sift the dry ingredients together
Cut in the butter โ€”ย in chunks
Throw caution to the wind and get your hands in the bowl! Kneed the dough until it forms a large, sticky ball
Pinch off small pieces and roll into balls, place balls on parchment paper lined cookie sheet
Press down with a fork and bake for 20 minutes โ€”ย rotate at the 10 minute mark
Let cool for a moment before moving to cooling rack โ€”ย I just transferredย the parchment paper over to the cooling rack
Enjoy sparingly! They might feel light and fluffy, but they are anything but!

A Vegan Experiment – The Recap

As my Vegan Experiment comes to an end and I start to reintroduce foods, what I had hoped would happen is actually happening! I am starting to question What I want, Why I want it, and Do I really want it or do I just want it because I can, and because I had wanted it either before this experiment started or during the experiment.

Throughout this month I have wanted everything, even the things I don’t normally eat and I figured out that I wanted those things because they were magically taken off my options list. Now that I’m looking to eat those foods again, I’m questioning if I actually really do want to reintroduce certain foods, just because I can.

At Whole Foods over the weekend I found myself confused about what to buy; why did I want a salad with egg and cheese? Was that what my body was really asking for or was I tempted by the option of having it? Would it make me feel good after eating it, or would it just make my tastebuds happy? I bought the eggs, but abstained from the cheese; I have yet to do anything with the eggs.

I also purchased two amazing milk chocolate bars, that are currently sitting, unopened, in my fridge… Prior to this month, I had gotten into a habit of eating A LOT of chocolate, consistently; after almost 31 days of (mostly) avoiding chocolate, my habit feels broken. And I’m calling it a habit, because eating chocolate wasn’t for enjoyment, it was because it was there and I wanted it. To be honest, I’m actually scared to break that barrier and have a piece of chocolate.

Overall the experiment has actually been what I needed: insight into my habits and an opportunity to break some of those habits. It also provided me with a better understanding of why diets fail and reaffirmed my belief that the best way to “diet” is to create small, sustainable lifestyle changes that focus on adding instead of taking away.

I am excited to eat certain foods again, but I will eat those foods with more awareness; something I’m hoping will last as this experiment fades in my memory. Who knows, I may pick it back up again in the future, but for now, I’m happy to remove the label! First thing on my list? Salmon! I don’t know if I’ve ever craved it as much as I have for this past month.

A Vegan Experiment

A few months ago my best friend suggested going vegan for a month. My eating habits lean towards clean vegetarian most of the time so I figured it wouldn’t be that hard. Boy was I wrong!

As someone who makes ethical food choices and avoids restricting food (unless there is a physical reason to do so), restricting my food to this level has been more of a mental challenge than a physical one. Even with my busy and active schedule, my energy levels have been fine and I haven’t found any issues recovering from my activities. I also haven’t noticed a change in my mental capacity; what has changed though is my desire for foods I don’t normally eat!

Prior to starting this experiment, I don’t remember the last time I ate cheese; since starting this month of veganism, my brain has told me every day that I want cheese. Thankfully, these aren’t physical cravings (like I sometimes get for DQ Blizzards), but just the fact that “I can’t” means that “I want”.

This experiment is teaching me that, just like when we were children and someone told us we weren’t allowed to do something, when we put restrictions on ourselves, all we want is what has been restricted.

My overall philosophy on food is to eat good, healthy food that is enjoyable, but don’t deamonize “treat” foods.

If you don’t find healthy foods enjoyable, begin by making small transitions, not massive overhauls; and avoid labelling foods as “bad”. When we set strict rules, deprivation follows; and deprivation leads to binging on what has been placed off limits.

If I’m trying to adjust a recipe to make it healthier, I start by substituting one ingredient; if that works, I’ll try substituting two ingredients the next time. This can be done with a recipe, a snack, a meal, a day, a week…wherever you start is perfectly wonderful! It’s all about starting the journey to a life-long, sustainable change.

As for me, I will continue this experiment until February 6. After that I will be back to my normal food habits: “Eat food, not too much, mostly plants” (Michael Pollen); “I’m a human, I eat food” (Alannah). When I do eat meat, I try to select healthy, local, organic/wild meat. And I will do my best not to binge on everything I currently “want” because I know I actually only want it because I “can’t” have it.

Gluten-Free Cranberry Almond Biscotti (secret ingredient below)

Uh, so, this happened this weekend!

Almond Biscotti

I realized I needed to get some Christmas baking done so I started a bit of research to see what could be easily done gluten-free and I found these little gems (which I made a few changes to. The original recipe can be found here).

The last time I made biscotti it was with wheat flour and I couldn’t find my friend’s recipe so I was a little nervous.

Apparently being nervous baking is a good thing because these turned out mind-blowingly good (if I do say so myself)! Are you ready for this?

Gluten-Free Cranberry Almond Biscotti

3 C Almond Flour (I used Bob’s Red Mill because it’s all I can find, and the meal-like consistency was perfect for these)
Pinch Salt (I used a fine sea salt)
1/2 tsp Baking Soda

2 Eggs
1 Tbsp Vanilla (yes, a full tablespoon! So good!)
1/4 C Liquid Sweetener (I used some Agave because I have some I’m trying to use up, and I didn’t want to use my honey)

1/2 C Dried Cranberries (approximate measure…I just dumped some into the mix until it looked like a reasonable amount)
And the secret ingredient…
Secret Ingredient

Melted white chocolate (Boom! Life changed! Thank you Carrie and Brooks for this secret) I used that much (less the pieces that ended up in my mouth…and the leftovers in the bowl after adding to the mixture).

Instructions
Pre-heat oven to 325
Melt the chocolate (you can use white, milk, dark, combination, go crazy, it’s chocolate and Christmas!)
Combine the Almond Flour, Salt, Baking Soda
Whisk the Eggs and Vanilla until fluffy (I used my hand blender’s whisk attachment; add the Agave and melted Chocolate and quickly whisk again to combine
Mix dry and wet
Add Cranberries
Transfer onto a Parchment-lined cookie sheet and form into a log (the mixture is quite sticky so I ran my hands under cold water to help form the log)

Bake for 30 minutes
Remove and let cool for 20 minutes
Slice and return to the oven for 15 minutes
Flip and return to the oven for a final 15 minutes

I packaged mine back like this for gifts.

Gift

I ate a lot of them…must make more!

Alternatives
1. Add dry-roasted pistachios
2. Dip in melted chocolate
3. Add slivered almonds
4. Milk/dark chocolate with mint chocolate dip
5. Let your imagination run wild!

Cashew Alfredo

Sometimes I get so excited about healthy food that I get overwhelmed and end up ordering take-out…not tonight!

After a morning of sweaty fun (hiked up Grouse Grind then went to a flow yoga class), I was about to drag myself off to Whole Foods to stock-up for dinner when I realized I actually had everything I needed to try Cashew Alfredo on quinoa pasta (I love GoGo Quinoa) with broccoli! Woohoo!

Cashew Alfredo with Broccoli

Cashew Alfredo
1C Raw Cashews
1/2C Water (I used some water and some soy milk)
1tsp Nutritional Yeast
3 Garlic Cloves (mine were small cloves)
1Tbs Lemon Juice
Dash Nutmeg
Dash Chili Flakes
Salt & Pepper to taste

Place all ingredients in food processor (or blender) and blend until smooth.
Cook pasta. I throw the broccoli in a few mins before the pasta is cooked. Drain, return to pot, and mix in Alfredo.

Cashew Alfredo

Kale & Beet Salad

Sometimes (most of the time), I’m a bad grocery shopper. I love grocery shopping so much, I’ll actually “window shop” at the grocery store! Anyway, the other day I was on my way home from visiting my grandma and found myself at Whole Foods (aka my favourite store). It was actually time to stock up for the week, but I found myself unprepared, as in, I had no idea what I wanted to be eating for lunches this week, never mind breakfast and dinner! As I stared, bright-eyed, at the produce, I thought: “BEETS! Oooh, and KALE!” Ok, I had a path… “Oh, and goat feta!” Done!

Image

Kale & Beet Salad
1 Bunch Kale
3 Medium Beets (roasted)
Quinoa
Goat Feta
Lemon Juice
Apple Cider Vinegar (optional)

*I learned how to strip kale from its icky (and wonderful, life-giving) stalk this weekend: hold the stem in one hand and the base of the green leaves with the other hand, pull the hand holding the green leaves away from the hand holding the stalk and voila! let there be stalk-less kale leaves!

Once my kale was stripped, I chopped it up and put it into a bowl. Instead of massaging each piece (like I’ve done for kale chips), I grabbed handfuls and squished it (like balling dough).

I roasted my beets (with their skins and stems) in a 450 degree oven, covered, for about 1 hour, rotating every 15 minutes or so or until I could poke them with a chopstick. After letting the beets cool, I peeled the skins off and chopped them up.

I made quinoa (with avocado, cucumber and Spike, wrapped in nori sheets) for dinner so it was an afterthought addition to the salad.

I mixed the kale and beets with a little lemon juice then added some quinoa, apple cider vinegar, and the goat feta in the morning; shake-shake-shake and yum!

Blender Green “Juice”

Recently, juicing has become uber popular! As much as I’d like a juicer, I know that realistically I don’t have the time to use it enough to justify the cost and space ๐Ÿ˜ฆ I’m extremely lucky that I live in a city that has cold pressed, fresh, organic juices readily available; however, they are expensive! So, I’ve put my $50 blender to use and created my own “juice”.

MindBodyGreen recently posted a beauty infographic about juices vs smoothies. Both have their benefits and are yummy!

The first green smoothie came about because I had eaten too much meat over the previous days and was talking to my mum about feeling “blah” and uninterested in food. Our conversation turned to what I had in my fridge and the below Vegetable Drawer Juice came about.

Apple Banana Green Juice

These are all water-based.

Vegetable Drawer
Broccoli Slaw
Leaf Lettuce
Celery
Frozen Blueberries
1/2 Frozen Banana
Lemon Juice

Strawberry Banana
Kale
Celery
Ginger
Frozen Strawberries
1/2 Frozen Banana
Lemon Juice

Apple Banana
Kale
Celery
Ginger
1/2 Jazz Apple
1/2 Frozen Banana
Lemon Juice

Not So Green
Celery
1/2 Jazz Apple
1/2 Frozen Banana
Ginger
Lemon Juice

Raspberry and Romaine Green
Celery
Romaine Lettuce
Raspberries
1/2 Frozen Banana
Lemon Juice
Mint Leaf
Date *added as a sweetener*

Minty Green Goodness – this one surprised me
Romaine Lettuce
Frozen Kale
1/4 Jazz Apple
1/2 Frozen Banana
Frozen Strawberries
Lemon Juice
2 Mint Leaves
Date
Hemp Hearts

Apple & Lettuce – Pre Wanderlust Power
Romaine Lettuce
1/2 Jazz Apple
1/2 Frozen Banana
2 Mint Leaves
1/2 Scoop Vega One French Vanilla
Hemp Hearts

Honeydew
Romaine Lettuce
Honeydew Melon pieces
1/4 Jazz Apple
1/2 Frozen Banana
Celery
1/2 Manjool Date
2 Mint Leaves
Ginger
Lemon Juice

For the Love of Food!

I’m lucky, I know, I’ve been blessed with good genetics and brought up by a mum who taught me to eat because I needed to. This meant small, clean, simple meals using olive oil and spices for the flavours instead of butter and cream. This upbringing has instilled a love of healthy foods with some treats thrown in the mix (I have a nasty sweet tooth and minimal willpower) and the ability to make healthy food that (I think) tastes good!

It saddens me when people aren’t excited to eat a “healthy” meal – a bed of lettuce with fresh veggies, lean protein and some lemon juice dressing – because they feel they’re limited to the boring and mundane. I know we all get into food ruts, but these ruts shouldn’t be caused by limiting your food options due to a diet! That, my friends, leads to a very viscous cycle of deprivation followed by indulgence, followed by…

It’s hard to reverse cravings you’ve spent a lifetime developing, but there are ways to minimize them, and I’m not going to tell you to drink water and wait 15 minutes, because, although wonderful in theory, does not work when my brain latches onto a Blizzard craving! My three craving-busting tips are:

  1. Work out! When a craving hits, work it off before you eat it, this does two things 1) gives you a workout, which leads to 2) raises your endorphin levels and lowers your desire for crap food
  2. Think about your craving and ask yourself if it’s really worth it, if the answer is “yes, if I don’t give into this craving I’m going to eat far more”, then
  3. Give in! Make the conscious decision to enjoy whatever it is you’re craving, and maybe order the smallest, pre-portioned size (not the family-sized bag of M&M’s because they’re on sale)

A point about number 2 up there; a lot of times, we try to replace the real thing with a “more healthy” substitution, these substitutions are usually chemical sh*t storms developed in a lab as an attempt to fool your body, they don’t work. If you’re craving sugar, don’t try to replace it with an artificial sweetener! However, if you’ve thought about your craving and have decided you can do better, a little honey won’t hurt.

Be conscious of your cravings and, as I’ve said before, add so many wonderful, healthy, clean, natural FOODS that you don’t have space for the junk anymore.

So onto the healthy tips:

  1. Use onions, garlic, spices, chili flakes… Chili flakes have become my go-to when a dish is lacking a little je ne sais quoi.
  2. Use millet (just bought some and excited to experiment!), quiona, zucchini, squash, rice noodles, rice, tofu noodles… there are so many options these days, play with them!
  3. Know your comfort foods. I LOVE spaghetti, maybe because we ate a lot of it when I was growing up, but, good golly, do I ever love it! But here’s the thing, my spaghetti sauce is loaded with spinach (or Kale), onions, garlic and organic tofu (or extra lean meat).
  4. Play with methods of preparing your food. Bored with baked chicken breast? Try stir-frying it for a salad topper.
  5. Did I mention spices!? Play! Get creative!
  6. Jump onto Pintrest to see what others are doing. When I was getting back into shrimp, I searched Pintrest for shrimp recipes and was amazed with all the options.
  7. Try to know what you’re eating. If you can’t/don’t know how/don’t have time to make it yourself, do your best to find a product as close to how you would make it if you could.
  8. In the words of Michael Pollan: “Eat food, not too much, mostly plants”

There is no magic pill, no magic workout, no replacement for eating good (tasty) food and sweating once a day.

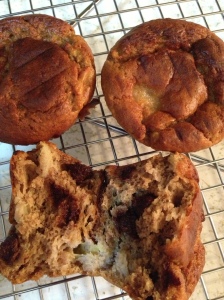
Gluten-free Applesauce Muffins

So last weekend I tried out this recipe for gluten free banana muffins and they ROCKED! So this weekend, I thought I’d try the same concept, but with applesauce and a few tweeks….totally worked ๐Ÿ™‚

GF  Applesauce Muffins

Gluten-free Applesauce Muffins

1/2 C Cashew Butter
2 Unsweetened Applesauce cups (probably about 1 C of applesauce)
1 tsp Baking Soda
1 tsp Vanilla
2 Eggs
1/4 C Honey
1 tsp Cinnamon
1 1/2 tsp Pumpkin Pie Spice
1/2 C Ground Oats/Almonds/Flax โ€”ย I just put them all in the food processor attachment of my hand mixer and ground them up together
1 scoopย Vanilla Protein Powder

Optional Add-ins: 1/2 Apple โ€”ย sliced, raisins, chocolate chips, berries, chopped nuts…I added apple slices AND chocolate chips ๐Ÿ™‚

Bake at 350 degrees for approximately 15-20 minutes
Flip uncooled muffins onto cooling rackย โ€” this works for me because I use silicone muffin cups

A weekend making dishes…I mean, delicious delights

So first up, an update, the day after I posted about the fitness photo shoot, it was canceled. I had to decide if I wanted to set one up myself or keep the deadline just ’cause or scrap it. I was toying with at least keeping the deadline, then my twitter feed was inundated with Kate Upton on the cover of Sports Illustrated and I decided I quite like my fit, yet curvy body! The silver lining is I remembered I love lifting weights and will try to do so at least twice a week ๐Ÿ™‚ If the opportunity presents itself again, I might say yes, but for now, I’m happy with where I am.

Where I am allowed me to have some fun in the kitchen this weekend!

Homemade Clif bars
I used this recipe and they are AMAZING!

I used honey and Nature’s Path Crispy Rice cereal (it’s gluten free) and I forgot to use my trusty protein powder. With that being said, they came out a little dry and crumbly. I threw them in the oven for a moment to soften up the peanut butter and honey…still a little crumbly. Will add a small amount of water next time, or less rice cereal and oats.

Flourless Banana Muffins
Adapted from this recipe. The original called for 2 bananas and 3 eggs and no “flour” of any kind, but I wanted a different texture so this is what I came up with:

1/2 C Peanut butter
3 Mashed Bananas
1 tsp Baking soda
1 tsp Vanilla
2 Eggs
1/2 tsp Salt (a few sprinkles)
1/4 C Honey (could probably cut this back due to the bananas)
1 tsp Cinnamon
1/4 C Non-Fat Greek Yogurt
1/2 C Ground Oats/Almonds/Flax โ€”ย I just put them all in the food processor attachment of my hand mixer and ground them up together
1 scoop Vanilla Protein Powder

Optional add-ins: chocolate chips, berries, raisins, craisins, chopped nuts…I added chocolate chips to mine and I could eat the whole batch in one sitting!

Banana Muffins

Preheat oven to 350
Combine all ingredients (it will be quite runny)
Scoop batter into muffin liners (I use silicone ones and love them)
Bake for 15-20 minutes โ€” until a toothpick comes out clean and muffins are golden
Flip onto cooling rack

One pan wonder!

Not gonna lie, I’m horrible at making dinners at home; well, here’s the way I see it: I work, then teach Monday-Friday so I’m not usually home until after 6pm anyway, then I try to make it to yoga most nights of the week, plus I’m single…so I eat at the Whole Foods salad bar A LOT! And I’m ok with that; however, I actually like to cook! And my recent discovery of Pinterest has only increased this love. Unfortunately, eating out has become a habit, so even when I have the time to make food, I don’t. So tonight I took it upon myself to make a quick, simple, one pan meal…SO GOOD (and easy)!

Shrimp, Veggies and Rice Noodles

That’s right, all that came out of one pan!

Another quick story, when I was young, my mum would buy me a bag of shrimp meat, and I would eat at least half of it…before we got home! This happened for a few months. Needless to say, I overdosed and I hadn’t eaten shrimp since. Over Christmas this year, I was at my sister’s house and she made shrimp for dinner, and I was hungry, so I went for it…and liked it! Which is good, because the nutritional content of shrimp is amazing! And they’re pretty inexpensive, in the scheme of meats.

Chilli Garlic Shrimp and Veggies

Butter
Chilli flakes
2 cloves Garlic
1/2 C Broccoli – maybe it was more
1/2 C Cauliflower – maybe it was more
10 pre-cooked Shrimp
Bundle Rice Noodles
Water

In a frying pan on medium heat, I melted some (a lot of) butter, threw in two cloves of chopped garlic, a sprinkle of chilli flakes, broccoli and cauliflower (my other new favourite ingredient). I added some water and covered until the broccoli and cauliflower started to become tender. Then I added some cooked shrimp (I was able to get them pre-cooked from Whole Foods) and rice noodles, a little more water, and covered again.

Once the noodles were looking done, I took the lid off to crisp everything up. And done!

Simple Sidedish

T’is the season to avoid brussel sprouts! Those nasty green balls always manage to make their way onto every plate on the table…

I am not (was not) a brussel sprout eater. Then I went to yoga teacher training and were food was provided to me and there wasn’t really much choice, but to eat them…or to miss a very large part of that night’s dinner. So I tried them. And, shockingly, I actually enjoyed them, and not just because I was starving!

I know my taste for them wasn’t just because I was hungry because I have since made them at home. The other night I made this beauty of a concoction:

20121220-172555.jpg

Super simple and, I think, enjoyable for all!

“Cheesy” Roasted brussel sprouts and cauliflower

Halved brussel sprouts
Chopped cauliflower
Toss in coconut oil
Sprinkle with garlic powder and nutritional yeast

Bake until browned at 400.

Christmas Baking in the Gluten-Free Kitchen

Since removing gluten from my kitchen many, many years ago, my Christmas Baking has suffered ๐Ÿ˜ฆ Until this year!

I found a recipe for sweet and spicy nuts and gave them a go; they’re good, but I think I’m going to switch back to my Mumma’s for the next batch:

1/2 tsp Salt
1 1/2 tsp Cumin
1/4 tsp Cayenne
1 Tbsp Sugar

3 Tbsp Oil
2 C Nuts (my mum uses Almonds, but I think Pecans lend themselves well to everything so a mix could be good too)
1/2 C Sugar

1. Combine first four ingredients and set aside
2. In a pot, caramelize the last three ingredients and keep them moving; remove from heat
3. Add the spice mixture into the warm
4. While still hot, empty onto two cookie sheets (parchment-lined) while spreading and separating
5. Allow to cool

20121220-183110.jpg

I also found…are you ready for this? Gluten-free (and healthy) Ginger Cookies! Cue the gasps! They’re not quite the same, but they’ll do (as the half-eaten batch sitting in my kitchen will tell you).

You may have caught on that, even when I’m baking, I don’t like to follow recipes word for word, but I did with this one. The edges turned out fantastic; I just need to figure out how to make that happen all the way through the cookie…

1 C Oat Flour (just grind oats to flour in blender – I used the food processor attachment of my hand blender)
1/2 Cup Almond Meal (just grind raw almonds in blender)
1 tsp Baking Soda
1 tsp Ground Ginger
1/2 tsp Cinnamon
1/4 tsp Sea Salt
1/4 C Stevia baking formula (or 6 packets of stevia – I used the packets)
1/4 C Brown Sugar

2 Tbsp Molasses
3 Tbsp Butter, softened (if you have to be dairy free, use margarine, but butter will produce a better result)
2 Tbsp Unsweetened Applesauce
2 Egg Whites (I used 4 Tbsp)

1. Mix dry (to Brown Sugar)
2. Mix wet
3. Mix together
4. Spoon (very liquidy dollops) onto Parchment-lined baking sheet
5. Bake at 350 for 10 minutes (I rotated at the half-way mark)
6. Let cool

Ginger Cookies

I found the middles of these cookies to be slightly dry, but as far as a gluten-free healthy cookie is concerned, these are good!


Three Ingredient Peanut Butter Cookies…Alannah’s Way

So apparently I bake when I’m bored! Having a quiet Saturday evening and was craving something sweat. After having a moment of weakness at Whole Foods the other night, I have some gluten-free “Oreos” in my cupboard, but I’d really rather eat something I’ve made. So last night I cracked open Oat and Raisin recipe again and tonight I went for Peanut Butter…

I had made a version of three ingredient peanut butter cookies in the past, but apparently didn’t post the recipe, so I found the following, basic recipe:

1 C Peanut Butter
1 C Sugar
1 Egg

And I changed it:

1 C Nut Butter – Peanut & Mystery (because that’s what I happened to have in the fridge)
1/2 C Organic Cane Sugar
1 Scoop Vanilla (Whey Gourmet Naturelle) Protein Powder
1 Egg
Chocolate Chips

Roll into balls and flatten with a fork, bake at 350 for approximately 10 mins.

I definitely feel better eating these over the craptastic, overly refined “Oreos”, but I know I still shouldn’t eat the whole batch ๐Ÿ˜ฆ


Quinoa Bites

I had the TV on the Food Network before running off to my next engagement today and Recipe to Riches happened to be on and I heard the words “quinoa bites” so I Googled it and found tons of recipes! So tonight I made these little gems:


I used this recipe as my guide, but, as you might have noticed, I’m not very good at following recipes; so below is a basic guide for what I did.

1 C White and Red Quinoa (cooked)
1 Grated Carrot
1/2 Grated Small White Onion
1/3 C Grated Parmesan Cheese
1/2 C Chopped/Crumbled Frozen Kale
Garlic & Chili Powder to taste (frankly, I was too lazy to peel and crush a garlic…)
Salt & Pepper
1 Egg (beaten)

Combine everything except the Quinoa and Egg in a large mixing bowel
Add the Quinoa and mix
Poor beaten Egg over the mixture
Scoop into muffin cups (I use silicone ones)
Bake at 350 degrees for 20-30 minutes (until lightly browned)
Pull out of the oven and cool on a cooling rack
Enjoy!

Rediscovering my love of baking with gluten-free blueberry muffins!!

Last night I had a shocking craving for my godmother’s blueberry muffins my mum used to whip up for me, but since going gluten-free I haven’t been very pleased with the muffin selection out there…and then this recipe happened…and now everything has changed!

These muffins are moist and fluffy, and oh so yummy!!

I made a few tweaks to the original muffins:

Gluten-Free, Yogurt, Flax, Blueberry Muffins

2 Eggs (yes, I use organic free-range)
1/2 C Extra Light Olive Oil (I had Coconut Oil and Extra Virgin Olive Oil on hand so I used 1/3 C combination of those instead – I don’t think the full 1/2 C is really needed)
1 1/4 C Packed Light Brown Sugar (I had regular Brown Sugar and Organic Cane Sugar so I used 1 C combination of those, not packed – these definitely don’t need the extra)
2 tsp Vanilla
1 C Sour Cream or Plain Yogurt (I used Fat-Free Greek)
2 C Pamela’s Ultimate Baking and Pancake Mix (I don’t usually like gluten-free flours, but Pamela’s is AMAZING!)
1 C Fresh or Frozen Blueberries
(I added approx 1/3 C Ground Flax)

Preheat oven to 375 and line a muffin tin
Mix Eggs to Yogurt until smooth, add Baking Mix and beat until batter forms, fold in Blueberries
Scoop into tins and bake for 20-25 mins, until golden and a toothpick comes out clean
Cool on a wire cooling rack

I’m nervous about how they’ll be tomorrow, but I can’t eat anymore right now because it’s already past my bedtime…well, maybe just one more… ๐Ÿ™‚ Enjoy!!