Gluten-Free Cranberry Almond Biscotti (secret ingredient below)

Uh, so, this happened this weekend!

Almond Biscotti

I realized I needed to get some Christmas baking done so I started a bit of research to see what could be easily done gluten-free and I found these little gems (which I made a few changes to. The original recipe can be found here).

The last time I made biscotti it was with wheat flour and I couldn’t find my friend’s recipe so I was a little nervous.

Apparently being nervous baking is a good thing because these turned out mind-blowingly good (if I do say so myself)! Are you ready for this?

Gluten-Free Cranberry Almond Biscotti

3 C Almond Flour (I used Bob’s Red Mill because it’s all I can find, and the meal-like consistency was perfect for these)
Pinch Salt (I used a fine sea salt)
1/2 tsp Baking Soda

2 Eggs
1 Tbsp Vanilla (yes, a full tablespoon! So good!)
1/4 C Liquid Sweetener (I used some Agave because I have some I’m trying to use up, and I didn’t want to use my honey)

1/2 C Dried Cranberries (approximate measure…I just dumped some into the mix until it looked like a reasonable amount)
And the secret ingredient…
Secret Ingredient

Melted white chocolate (Boom! Life changed! Thank you Carrie and Brooks for this secret) I used that much (less the pieces that ended up in my mouth…and the leftovers in the bowl after adding to the mixture).

Instructions
Pre-heat oven to 325
Melt the chocolate (you can use white, milk, dark, combination, go crazy, it’s chocolate and Christmas!)
Combine the Almond Flour, Salt, Baking Soda
Whisk the Eggs and Vanilla until fluffy (I used my hand blender’s whisk attachment; add the Agave and melted Chocolate and quickly whisk again to combine
Mix dry and wet
Add Cranberries
Transfer onto a Parchment-lined cookie sheet and form into a log (the mixture is quite sticky so I ran my hands under cold water to help form the log)

Bake for 30 minutes
Remove and let cool for 20 minutes
Slice and return to the oven for 15 minutes
Flip and return to the oven for a final 15 minutes

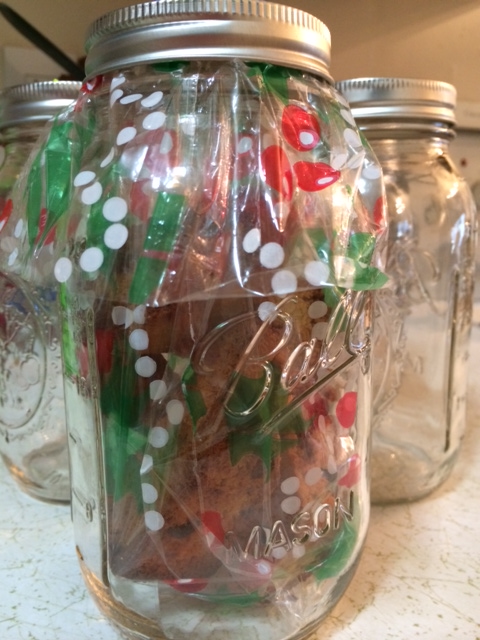
I packaged mine back like this for gifts.

Gift

I ate a lot of them…must make more!

Alternatives
1. Add dry-roasted pistachios
2. Dip in melted chocolate
3. Add slivered almonds
4. Milk/dark chocolate with mint chocolate dip
5. Let your imagination run wild!

Three Ingredient Peanut Butter Cookies…Alannah’s Way

So apparently I bake when I’m bored! Having a quiet Saturday evening and was craving something sweat. After having a moment of weakness at Whole Foods the other night, I have some gluten-free “Oreos” in my cupboard, but I’d really rather eat something I’ve made. So last night I cracked open Oat and Raisin recipe again and tonight I went for Peanut Butter…

I had made a version of three ingredient peanut butter cookies in the past, but apparently didn’t post the recipe, so I found the following, basic recipe:

1 C Peanut Butter
1 C Sugar
1 Egg

And I changed it:

1 C Nut Butter – Peanut & Mystery (because that’s what I happened to have in the fridge)
1/2 C Organic Cane Sugar
1 Scoop Vanilla (Whey Gourmet Naturelle) Protein Powder
1 Egg
Chocolate Chips

Roll into balls and flatten with a fork, bake at 350 for approximately 10 mins.

I definitely feel better eating these over the craptastic, overly refined “Oreos”, but I know I still shouldn’t eat the whole batch 😦


Rediscovering my love of baking with gluten-free blueberry muffins!!

Last night I had a shocking craving for my godmother’s blueberry muffins my mum used to whip up for me, but since going gluten-free I haven’t been very pleased with the muffin selection out there…and then this recipe happened…and now everything has changed!

These muffins are moist and fluffy, and oh so yummy!!

I made a few tweaks to the original muffins:

Gluten-Free, Yogurt, Flax, Blueberry Muffins

2 Eggs (yes, I use organic free-range)
1/2 C Extra Light Olive Oil (I had Coconut Oil and Extra Virgin Olive Oil on hand so I used 1/3 C combination of those instead – I don’t think the full 1/2 C is really needed)
1 1/4 C Packed Light Brown Sugar (I had regular Brown Sugar and Organic Cane Sugar so I used 1 C combination of those, not packed – these definitely don’t need the extra)
2 tsp Vanilla
1 C Sour Cream or Plain Yogurt (I used Fat-Free Greek)
2 C Pamela’s Ultimate Baking and Pancake Mix (I don’t usually like gluten-free flours, but Pamela’s is AMAZING!)
1 C Fresh or Frozen Blueberries
(I added approx 1/3 C Ground Flax)

Preheat oven to 375 and line a muffin tin
Mix Eggs to Yogurt until smooth, add Baking Mix and beat until batter forms, fold in Blueberries
Scoop into tins and bake for 20-25 mins, until golden and a toothpick comes out clean
Cool on a wire cooling rack

I’m nervous about how they’ll be tomorrow, but I can’t eat anymore right now because it’s already past my bedtime…well, maybe just one more… 🙂 Enjoy!!

A Labour Day in the Kitchen

After an exciting three nights in Whistler competing in the Meet Your Maker 50 relay, I got home EARLY this morning and emerged from my kitchen many hours later!

What came out of my experimentation…

  • Steel-Cut Oat Muffins — adapted from Busy But Healthy (adapted from sugarfreemom.com)
  • Raw Cinnamon Buns — from Health Damy
  • Potato Salad

Steel-Cut Oat Muffins

My typical breakfast has been home-made granola and plain greek yogurt for the past…MANY years. So in a quest to switch it up a little, I found this beauty, which I altered slightly in an attempt to make a half batch and not use applesauce (mine had been sitting in  my cupboards for longer than I care to remember).

1 1/4 C Steel Cut Oats
1 tsp Cinnamon
2 Tbsp Ground Flax
1 scoop Vanilla Protein Powder
Pinch Salt
1/2 tsp Baking Powder

1 Mashed Banana
1 tsp Vanilla
1/2 C Milk (I used Rice Milk)
1/2 C Water
1 Egg White

Bake at 350 degrees for 20-30 Minutes
Combine dry ingredients, combine wet ingredients; mix together
Fill muffin cups — I put Strawberry Jam in the middles; to do this, fill 1/3 muffin cup, add dollop of jam, add more batter

Raw Cinnamon Buns

My wheat-weakness is Cinnamon Buns so this recipe has been on my “to-try” list for a while now and I finally got around to it…and…although good, they won’t be replacing the real deal any time soon! But they ARE good. 

I followed this recipe pretty closely so I’m not going to write it out; however, the change I’d suggest is to cut down on the sugar!! I don’t think I’ll use any Agave next time as the dates are sweat enough.


Potato Salad

I always forget how much I LOVE red potatoes! Potatoes aren’t a staple in my diet, but I definitely have a soft spot for them and summer, although it’s nearing an end, just screams red potatoes!

3 Hard Boiled Eggs
6 Cooked Red Potatoes
1 Small Red Onion
3 Green Onions
1/2 Bunch Kale

Place chopped Eggs and Red Onion into a bowl
Mix in HOT cubed Potatoes — adding them hot soften the Red Onion just enough and really helps the flavours
Add Green Onion and chopped Kale

An Evening at Home

I’ve been running around, a lot, recently and tonight, instead of going to a yoga class (as I had hoped to), I made the decision to spend some time at home; making some food I keep meaning to make — zucchini pasta with home made pesto followed up with a blueberry-strawberry crisp 🙂 I feel like I made a good decision!

Pesto
1 Large Garlic Clove
3 Tbsp Shaved Parmesan
1 Bunch Basil — I used one of the packages from Safeway
3 Tbsp Toasted Walnuts —I wanted to use the traditional Pine Nuts, but my local Safeway didn’t have any and I didn’t want to go to another store
5 Tbsp Olive Oil

Place Garlic, Parmesan, Basil, Toasted Walnuts into food processor and let it run
Scrap down the edges
Drizzle Olive Oil into the bowl while the food processor is running
**Adapted from the Cuisinart Food Processor Guide

Zucchini Pasta
Peel skin
Using a peeler, peel one area until you get close to the seeds, then work your way onto the next side
Place “pasta” into lightly oiled frying pan and soften
Add 1 Tbsp of Pesto and warm —stir a few times
**I wouldn’t suggest this as a full meal, but definitely an amazing side dish for some white fish or something

Blueberry-Strawberry Crumble
1 C Frozen Blueberries
1/2 C Frozen Sliced Strawberries
1/2 tsp Cornstarch
1/2 tsp Pumpkin Pie Spice
1/3 C Earth Balance —or Butter, or whatever you use
1/3 C Brown Sugar
1 tsp Cinnamon
1 1/2 C Oats —I use Bob’s Red Mill Gluten Free

Pour Berries into a baking dish —I use a 4×4 CorningWare one for these proportions
Sprinkle and stir in Cornstarch
Sprinkle with Pumpkin Pie Spice
Melt Earth Balance and Brown Sugar
Stir in Cinnamon and Oats
Pour Oat mixture over Berries
Cover with tinfoil and bake for approximately 15 minutes at 350
Remove tinfoil and bake until golden —approximately 10 more minutes

The Great Peach Experiment!

After a somewhat successful Pumpkin Experiment, I decided I wanted to try peaches! And this is what came out of it…

Aren’t those cups cute!?

They collapsed a little bit because I tried to add some streusel topping – I need to work on my gluten-free streusel!

The (approximate, as always) basic recipe is:

1/2 C Ground Flax
2 Peaches – blended
1 1/2 tsp Vanilla
1/2 tsp Honey (*my peaches weren’t fully ripe so I felt a little extra sweet was required, but I’m sure this can be omitted without hesitation)
1/2 tsp Cinnamon
1 Egg
1 tsp Coconut Oil
1/2 tsp Baking Soda
1 scoop Vanilla Protein Powder

Whisk all ingredients and scoop into muffin cups. Bake at 350 degrees for approximately 20 minutes – until tops are golden.
You can try with the streusel – I combined sugar, Earth Balance, almond flour and cinnamon.
As with the Pumpkin Loaf, you can sub the egg to make these dairy-free as well as grain- and nut-free!
These came out eggier than the Pumpkin Loaf so I’m thinking less peach and/or more flax and/or some oat/almond flour next time.

Random Ginger Pumpkin “Loaf”…

I’m not really sure what to call this because, during all of my many moves, I have ended up without my mini loaf tins AND my muffin tins 😦 Both are on my “to buy” list!

I think this batter will definitely lend itself well to being a loaf and/or muffins and turns out extremely moist.

I finally did it! I made something gluten-, grain- AND nut-free! It could also be dairy-free by using egg replacer and vegan protein powder.

The following is a rather bland recipe and I will need to tweak it a bit, but it currently ticks off all the boxes that I needed it to! *Note: measurements are approximate.

1/3 – 1/2 C Ground Flax
1 1/2 Tbsp Grated Candied Ginger
1/2 C Canned Pumpkin
1 Tbsp Pumpkin Pie Spice
1 Egg
Pinch Salt
1/8 C Coconut Oil
1 Scoop Vanilla Protein Powder
1 tsp Baking Soda

(*I should have added 1 tsp Vanilla, but didn’t; I think I will also add Raisins next time)

Mix all ingredients (I used the whisk attachment of my hand blender). Pour into tin of choice and bake for approximately 20 mins at 350 degrees, until a knife/toothpick comes out clean and top is golden.

Cauliflower Crust Pizza

I feel like my last couple of posts were quite deep and serious, so it’s time for another recipe!

This is from a few weeks back, but with a picture that looks this good, you know it needs to be shared! For the most part, staying wheat/gluten-free hasn’t affected my life; however, I MISS PIZZA!! There are many pre-made gluten-free crusts out there, but I have two issues with them: 1) they don’t taste very good, and 2) they’re typically made from white rice flour, tapioca starch and other things that have zero nutritional value and spike your blood sugar through the roof! Sooo, when I learned about Cauliflower Crust, I had to give it a shot! And I’m SO HAPPY I did because, frankly, it changed my life!

There are many recipes out there for this amazing crust, but I’ve stuck to the following one from the word go — it’s easy and has passed all picky eater tests.

Hanna is about six! My friend’s fiance also exchanged his pita crust version for ours the first time we made it.

So, without further ado (thank you to Eat. Drink. Smile.)…

1 C riced, cooked Cauliflower
1 C shredded Mozzarella
1 beaten Egg
1 tsp dried Oregano
1/2 tsp crushed Garlic
1/2 tsp Garlic Salt
Pizza sauce and toppings of choice

Directions:
1. Preheat oven to 450 degrees
2. Rice the cauliflower — place chunks in a food processor and pulse until the cauliflower looks like grain
3. Place riced cauliflower in a microwaveable bowl and cook for 8 minutes (no need to add water)
4. Mix the beaten egg, oregano, garlic and garlic salt together
5. Add the cheese and egg mixture to the cooked cauliflower
6. Dump the mixture onto a sprayed/greased cookie sheet and spread out VERY thinly, leaving the edges a little thicker; don’t worry, it will all come together as you push it around
7. Place in the oven and bake for about 15 minutes, until golden
8. Remove from oven and top — some tips here: make sure toppings that require cooking are pre-cooked, avoid toppings that add moisture, make sure toppings are light and spread thinly
9. Broil until cheese starts to bubble
10. Remove and enjoy!!

I haven’t tried this, but I’ve been told that goats cheese will melt appropriately for the crust so can be used instead of full fat (yes, you need the full fat kind as this is what holds the cauliflower together) cows milk mozzarella.

Grain-Free Protein Chocolate Chip Cookies!

Are you ready for the sharing to begin!? I’m IN LOVE with these cookies and have adapted the recipe from Detoxinista.

1C Nut Butter (I use a random combination of smooth peanut butter, almond butter and cashew butter)
1/3C Honey (I love honey so am totally ok using the full amount, but I’m sure you can mix and match with Agave and/or Stevia)
1 Egg (you can also use a Flax Egg, but I haven’t experimented with that yet)
1/2tsp Salt (if your nut butters are unsalted)
1/2tsp Baking Soda
1/2C shredded Coconut (optional and no modifications are necessary with omitting)
1 scoop Protein Powder (I used Natural Vanilla by Whey Gourmet and added about a tablespoon of  Original Coconut Milk to avoid the cookies becoming too dry)
1/2C Chocolate Chips

Preheat oven to 350. Combine everything but the chocolate chips – I throw it all into a bowl and use the whisk attachment of my hand blender to combine. Fold in the chocolate chips. Scoop onto a greased or parchment covered cookie sheet and bake for 8-10 mins (until golden), rotating half-way through. Leave on the cookie sheet to cool as they come out of the oven very soft!I tested them on my friend’s fiance and they passed with flying colours!